Gardening Tips for Busy People: Easy Spring Cleanup Garden Project Part One

Early Spring in the Garden

A Lush and Green Landscape

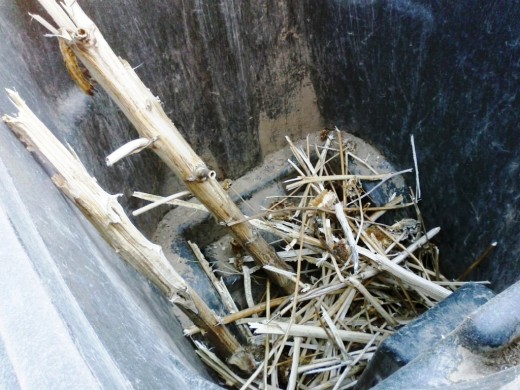
Tips for Using a Yard Waste Can
- Break up the largest stalks first and put them in the empty can. These heavier and longer items will help bring the rest of the stuff out of the can when the garbage truck comes around.
- Break the smaller stalks into short lengths about eight inches long.
- Put the fine vines in last.
Break Up Large Stalks to Fit More Into the Can
Weed Barrier Made From Cardboard Compost

How to Clean Up A Garden Spot
By working in 30 minute time-blocks, You can get a lot done in one afternoon. The first step, or layer of this project is to have a plan for what you will do with the brush you clear from the garden. Once you have the answer to this question, your progress will be fast. Below, you will find a list of tools used in this project, cost estimates, and information as to how the tools were used.
The Plan for the First Day of Gardening:
- Disposing of old growth garden vines and stalks. This can take some thought during your planning process, whether you do it on paper or in your head. Most people who live in town have containers that are specifically for garden and yard waste, like the one shown at your right. If you live out of town, or on a large lot, you can develop a composting area as well. Because this is a smaller lot in town, and because I literally have tons of dirt, I get rid of the large dead stalks and just work the small, fine stalks and leaves back into the soil as I go. Still, it leaves me with a fairly large amount of brush to get rid of in the spring.
- Create Weed Barriers and Walk Ways. To save money, I use some strips of carpet that were removed from my house. These make great weed barriers. You can also use large, heavy cardboard boxes, such as the one shown at your right. This year I will use both. The cardboard will eventually break down and feed the soil. The carpet makes a nice walking path for bare feet in the garden. This year, I think I will place the cardboard under the carpet, and create some new places with weed barriers so that I can harvest the berries more easily this year. Once the garden starts growing, you don't even see the weed barriers.
- Position The Barriers. Position the weed barriers to allow you to access the plants that are toward the back of the bed. When Harvest time comes, you will be able to reach the plants to harvest the fruit or vegetable without getting too tangled up in the other plants.
Layering Projects to fit Your Time Management Needs

Breaking Large Garden Projects Into Smaller Chunks

What is Your Gardening Pattern?
How does your garden usually grow?
An 8 by 24 Foot Raised Bed
Several of my friends say they don't garden because they are afraid it will take too much of their time. Another reason is that they worry they can not do it without a lot of help. I am here to say that all you busy girls out there can have a nice garden that does't take over your lives.
Last summer, this garden area was lush with berries, flowers, and very large mammoth sunflowers. During the fall, I trimmed the leaves and flower heads off the sunflowers, but this spring there is still a lot of dead plant matter to clear before planting can begin.
This 8 foot by 24 foot raised bed began taking shape three years ago, when I found myself in possession of several large mounds of dirt that I did not know what to do with. At the time, I did not realize just how much dirt would need to be removed in order to make the ground level enough for my above ground pool that I had gotten on sale at Walmart.
So there I was with all these huge piles of dirt that had to be moved somewhere quickly. With some landscape poles, heavy black plastic, and re-bar from from Lowe's I created the frame for this raised garden bed in a couple of hours. Then, since I couldn't afford to pay someone to do it, I began moving those piles of dirt with a large rolling bucket, and the raised bed you see here was born. I still have one pile of dirt, and add a little more dirt here and there whenever the spirit moves me.
- The final phase of this project will be to line the outside of the bed with brick to match the rest of the brick used to line the flower beds and pool area.
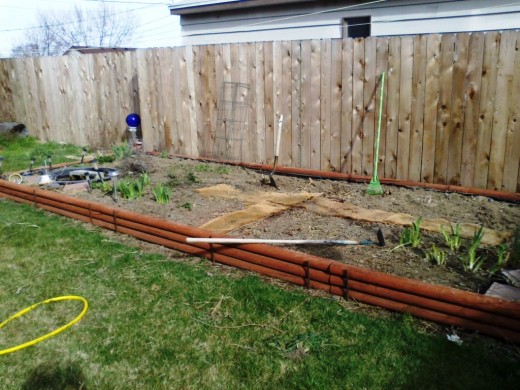
Progress After the First Afternoon's Work
Was This Article Helpful and Inspiring?
Clean Up Progress Check
At the end of the afternoon, this is what the garden bed looked like. The photo shows that the brush is gone and the new growth plants are exposed. I moved about 5 strawberry plants and 2 bachelor button plants. By breaking up the large plant matter into short lengths, I was able to fit everything into the yard waste can. The heavy sunflower stalks will help pull the lighter stuff out when the city empties the can.
Both the sage growing by the pond and the raspberries at the other end were pruned back to train them to grow in specific shapes and to keep them from getting out of control.
Total time spent today was about 4 hours, but only 2 1/2 hours were actually spent working. Included in the 4 hour time block, I took lots of photos, stood back to admire my progress, and took lots of breaks to do little things, or just make notes about my garden.
The Plan For Tomorrow. Tomorrow I will be working on organizing the garden into sections, and planning where I will plant small blocks of vegetables and other plants. While I am doing this, I will be smoothing the ground and laying the cardboard weed barriers If there is enough time, I will go ahead and plant some seeds.
Basic Garden Tools

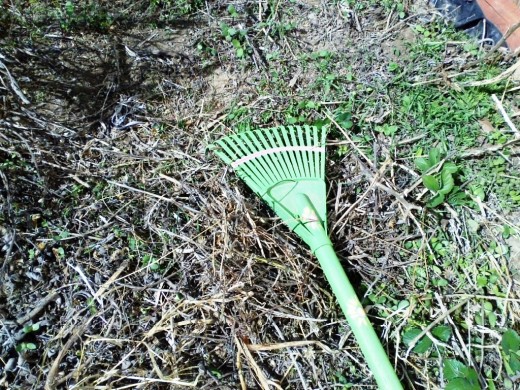
A Very Small Rake Goes Between Plants
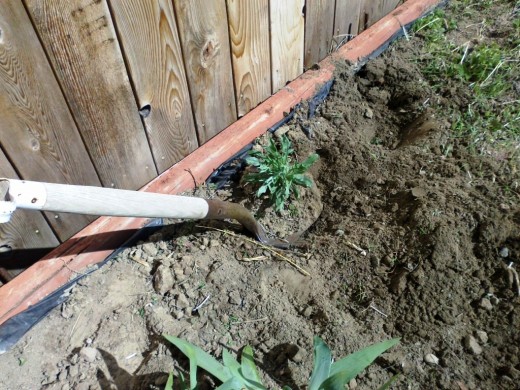
Transplanting a Bachelors' Button
Tools You Need to Clean This Garden Spot
- Garden Rakes. You will need a couple rakes like those shown at your right. The small rake is for cleaning out between plants. A large rake would damage the plants you want to keep. It is used for raking up medium to small dead fall in large, clear areas, and for raking the grass.The cost is very little for these. For both rakes, the total price was less that $15.00 a couple years ago. The smallest rake cost only $4.98, if memory serves correctly. The larger rake is a metal rake and they are typically more expensive, but I got this one on sale at the end of the year, and lucked out. Usually they cost between $15 and $25 in my area, depending on what store you go to.
- Pruning Clippers and Nippers. To be very honest, I get these from a local discount grocery outlet store. The cost between $5 and $7 bucks and come out of the package sharp enough to actually cut something. Be sure to remember to always wear gloves when using sharp instruments. These clippers can be used to shape large perennial plants and shrubs. I use them to train my roses, raspberries, and other plants to sort of grow in the direction I want them to go and to keep them from getting out of control and taking over the entire space.
- Gardening Gloves. I could spend more money and probably get better gloves, but I like to have cute and colorful gloves for my projects. These are inexpensive gloves and I usually buy several pairs in the spring. This way, my gloves can match my clothes when I am working outside. Besides, they protect my hands and keep me from getting slivers and too much dirt under my nails.
- Shovels and Hoes. A short handled spade type of shovel is great for transplanting small plants that have come up from the year before. I use this same spade to turn the soil and get it ready for planting. After the earth has been turned, I use the hoe to break up large clumps and to keep weeds from getting started around the plants.
Moving Strawberries Around

© 2014 Nancy Owens